Making autumn crafts with your own hands. Autumn basket: several ideas for crafts made from natural materials Autumn flower crafts
An autumn-themed craft is a wonderful accessory. Children in kindergarten, students at school and adults at their leisure can make them. Autumn is one of the most enchanting periods when you can enjoy the red and yellow colors of the landscape.
Thanks to the variety of gifts of this time, an apartment or cottage is decorated with outlandish crafts made from pine cones, autumn flowers and leaves. When a kid wants to help his parents create some interesting trinkets and crafts, that's just wonderful. Some of them become truly real works of art. We will try to reveal the most entertaining and original options for making autumn crafts with your own hands, which will be especially useful for parents whose children attend kindergarten or school. And you can take a closer look at some ideas and make crafts to decorate your home.
Cones are a natural material from which you can make many strange things. You just need to give free rein to your imagination, show a little perseverance and... voila, a wonderful accessory will be ready, pleasing the eye and bringing a great mood.

When making autumn crafts from pine cones, you need to connect them with threads, wire or elastic. The most reliable option is to use superglue. Various natural and artificial materials are attached to the cones, for example, acorns, twigs, grains, threads, etc.
Advice! If you can’t hold the hard buds together, you can soak them in water for a couple of hours. When they become soft, they need to be dried thoroughly. Such manipulations will allow you to cut the cones and pierce them with a nail or awl.
You can create anything from the fruits of coniferous plants - animals, people, insects, wreaths. Thus, open cones are used to make the body of a turkey or camel, and closed cones are used to construct the legs. The simplest autumn craft is a bird, which even a small child can make.

Hedgehogs are often made from the cones of almost any coniferous plant. To create the craft, special dough or plasticine is used to mold the paws and head of the animal. The cone is used as the body of the future hedgehog. The eyes are made from black peas, beads or rowan berries. By using different types of cones and adding a bit of imagination, you get very cute and funny animals.

It is more difficult to make figurines of such representatives of the animal world as camels, swans or deer. To make the cervical region of animals, you can use caps of acorns, which must be strung on a curved base made from a piece of wire. The animal's head is made from an acorn. On the Internet you can find a variety of diagrams and photos of ready-made crafts that will help you create an autumn animal.
Another interesting option is the arborist. It can be made using ripe and unripe cones, which are held together with thin wire. To connect the torso and head of the forester, you need to use glue. To make a mustache, you can use small needles, and for eyes - scales from a cone.
Note! In addition to crafts, cones are used as a finishing material for many items. For example, you can make a beautiful basket from a pine or spruce cone; they fill candlesticks with them and decorate autumn wreaths on the door. Even a simple pot with an indoor flower, beautifully decorated with pine cones, will look completely different.
Compositions from autumn leaves
The golden leaf is the main attribute of a beautiful autumn. In addition, you can make a large number of unique and interesting crafts from it.
To decorate your home and fill it with a charming autumn spirit, you can make the following compositions yourself:
- Pendants and garlands made of leaf blades. To make it you will need two or three leaves, colorless varnish, paraffin, thread or tape. Autumn leaves are varnished and then dipped in melted paraffin. They are tied with threads or beautiful ribbons, made into loops and hung in the right place. You can also string beads onto a thread or ribbon, which will add a special touch to this accessory. A garland is a more complex decoration option. To make it, you need to treat the leaves in varnish and paraffin, and then fasten the leaves one by one on a thread or tape, leaving small gaps.

- Candles and candlesticks with leaves. First, the leaves are dried using a press or iron. The outer part of the jar can be covered with leaves and coated with transparent varnish and a beautiful candle can be placed inside. Large candles are decorated in the same way, using leaves of different types and sizes.
- Bouquets of autumn leaves. Maple leaves are used to make pretty roses, which are not only collected into bouquets, but also used as decoration for wickerwork. The leaves are wound around the workpiece and the edges are folded back, resulting in a beautiful rose. Detailed information on how to properly make such flowers can be found online. For a beautiful composition you will have to prepare 5-7 pieces of flowers.

- Frames of autumn leaves. Wall clocks and photographs framed with yellow and red leaves are pleasing to the eye. To make such a composition, you need to stick leaves on the frame and then cover it with colorless varnish. If some elements protrude too much beyond the edges of the frame, they can be carefully trimmed.

In addition, you can make an autumn owl. First, take a strong cardboard on which the silhouette of a bird is depicted and cut it out. Prepare the eyes, paws and beak separately. Starting from the bottom edge, dry leaves are glued to the outline of the owl, alternating their color. When the bottom part is ready, you can glue the legs. Having completely finished gluing the leaves, you need to attach the yellow eyes, adding black circles on them, and the ears of an owl. All that remains is to glue the beak in the middle of the composition. This craft will fit perfectly into the interior of your home or will appeal to your child in kindergarten.
Making crafts from fruits and vegetables
The gifts of autumn will be a great decoration in your home. Paradise apples are not only a delicious fruit, but also a good material for crafts. You can simply put them in a basket on the table or hang them on the wall. Other fruits that look harmonious with autumn flowers are also suitable. For example, a composition containing ripe pomegranates and pears.

Various berries are used as an ornamental material for work. It could be viburnum, rowan, rose hips or wild grapes. They will look charming in a candlestick or fall wreath. On the table or by the fireplace you can place a bunch of viburnum or rowan along with yellow leaves, which will remind you of the extreme beauty of this time.
Cereals and corn are often used to decorate homes. Our grandfathers and great-grandfathers also believed that wheat was a symbol of fertility and prosperity. Therefore, a wonderful composition made from wheat ears and other grains will become an integral attribute of the autumn table. The front door can be decorated with a wreath of autumn leaves and cereals.

An excellent material for making crafts is corn. Below are popular things that can be made from it:
- Candlestick made of corn. To make it, you need to take a large thick candle, an elastic band, several heads of cabbage and decorative ribbon or twine. Stretch a rubber band around the candle and then insert heads of corn between them. When the candle is completely surrounded by corn, tie a ribbon tightly in place of the elastic band. You can also use hot glue to glue the heads of cabbage to the candle, but it will ruin the material so it won't be able to be used in other crafts.
- Decoration for a cottage extension. To make this you will need several ears of corn. You need to take a pitchfork and put the cobs on the tines. Then the forks are hung with the handle down.

Pumpkins are used not only for Halloween celebrations. When you need to plan a children's party at home, a pumpkin makes a great decoration. For example, small pumpkins with names can be placed on guests' plates. It is best to take fruits of the same shape or buy decorative pumpkins in the store. First you need to paint them silver, gold or another color you like. The guest's name is written by hand or printed on special adhesive paper and attached to the spine of the vegetable.
Applications for children for school and kindergarten
Application is something that almost everyone has encountered in kindergarten or school. To make it, you can use various materials - leaves, colored paper, scraps of fabric, straw, glitter, etc.

On the Internet you can find many instructions and diagrams that will help you make wonderful applications. They are made by both adults and children. Here are some interesting options:
- Butterflies made from bright autumn leaves. To make an applique, you will need leaves (preferably two yellow and two red), two acorns, black peas and decorations of your choice (rowan berries, etc.), glue and cardboard. We glue 2 acorns to the cardboard, which will be the body of the butterfly. Next we glue the wing leaves: red at the top and yellow at the bottom. You also need to glue two black peas, which will be the eyes. All that remains is to decorate the butterfly at your own discretion. In this way, you can create applications of other animals by first making a blank.
- Felt leaves. Find on the Internet or make several blanks yourself and cut out leaves of the same shape in different colors from felt. Then you need to mark the place where the veins will pass. Using scissors, you need to cut out the veins in one leaf. Then one whole and one cut leaves are connected and stitched along each branch.
- Window decoration. To create an interesting applique, you need to take a lot of autumn leaves of different shapes and colors, as well as glue and a large sheet of paper. Different shapes are cut out of paper - hearts, droplets, flowers. Then different autumn leaves are glued onto these figures. After the application has dried, it is used to decorate the glass.

- "Spider." To make the composition you will need to take 8 even thin branches, white thread, autumn leaves, chestnut, cardboard and glue. You need to glue 8 branches onto the cardboard, connecting them in the center, this will be the basis of our web. Next, use a thread to make the web itself and glue leaves to it in random places. You need to place a leaf in the center and attach half a chestnut to it. This will be the spider, to which you need to glue small legs, that is, thin and short branches. This craft is very simple, but looks quite original.

The process of creating an interesting application does not take much time and is not difficult. But it will become a highlight in the interior of any home or cottage.
Making crafts from physalis
Physalis is a perennial plant from the Solanaceae family. It has an outlandish shape, and got its name from the Greek word “physo”, which means “swollen”. It is in the swollen cups that the juicy fiery orange berries ripen.

Since physalis can go without water for a long time, it is used as home decoration. Below are several interesting options for crafts made from the fruits of this plant:
- Physalis garland. To create an accessory, you need to carefully remove the fruit with sharp scissors, and also cut out the stalk. In this case, the hole is made small so that the flowers do not fall while the garland is in use. Then the flowers are placed on the “spot” bulbs of a purchased garland.
- Autumn elf. To make such a small miracle, you need dried physalis flowers, wool or felt (two different colors), ribbons, wooden beads, brushes, acrylic paints, a glue gun and scissors. From the first piece of wool (felt) you need to cut a circle - this will be the collar. From the second piece you will get a hat, for which you cut out a triangle with two sides of 7 cm each. Then the triangle is connected with a cone and glued. At the top of the cone you need to secure and glue a ribbon. Pre-formed hair made from thread or wool must be glued to the inside of the cap. Next, you need to check whether the diameter of the wooden bead fits the hole in the hat. All other parts are assembled using a glue gun. The autumn man is a design that consists of a cap-hat on a ribbon, beads, hair, collar and physalis. To decorate the eyes, mouth and nose, use a brush and acrylic.
Autumn is the best time when you can collect a large amount of different materials, from which you can later make various crafts. What can you use to create interesting things? Just think. It turns out that your materials for crafts will be:
- leaves,
- seeds,
- chestnuts,
- bumps.
How to make a bouquet of autumn leaves
Yellow leaves are the most popular material for autumn crafts. Autumn applications and various crafts are made from the leaves. In addition, they are repainted and truly beautiful masterpieces are created from them. Now we will propose making an autumn bouquet from fallen leaves.

Work progress:
So, you will need maple leaves. For such work, you do not need dry leaves, but already yellowed but flexible ones. So, you should make a rose from a maple leaf. First, you should bend a maple leaf in half for the middle. In this case, the front side of the sheet should be on the outside. The sheet is folded in half and rolled into a tight tube.
The resulting middle should be supplemented with petals. They are the ones who will help create a bud. For this work, it is worth placing a folded autumn leaf about 1.5 cm above the middle. Then we wrap this sheet around the middle and tie it with threads. The edges protruding from above must be folded back. For each rose we make 7 petals.


Autumn crafts from acorns
On long and rainy evenings, all residents make crafts on the theme of autumn. It is worth saying that such an activity helps to develop thinking. In addition, you can get continuous positive emotions from such an activity.
In autumn, in the forest or in the park you can collect a huge number of acorns. And from this natural material you can make unique crafts that will transform the design of your home.
You can make more than just crafts from acorns. It turns out that they can be poured into glass containers and used for home decoration.

And for the next craft you will need a dry twig and acorns. In this case, the acorns must be painted with acrylic paints and hung on this dry branch. A branch with acorns should be placed in an attractive vase. That's all, now you just have to admire this unusual decorative element.

Note! To make the craft original, first remove the caps from the acorns before painting. After the paint has dried, glue them back on.

To decorate your home, you can felt acorns from wool. But it’s better to glue natural hats to them.

Acorn caps are also suitable for decorating a picture frame or mirror. You can also decorate a photo frame with acorns. It looks very stylish and cute at the same time.


Acorns are suitable for holiday decor. For example, you can make a bunch of grapes from them. And to make such a craft you need to take well-dried oak fruits. There is a through hole in the acorns using an awl. Then we put the acorns on the wire. The cuttings of acorns are wrapped in corrugated paper, but the acorns are painted with acrylic paints. Bunches of grapes are collected according to the principle of weaving a wreath. And brush leaves are usually made of paper. The bunches of grapes will be decorated with them.

What crafts can be made from pine cones?
In this publication you can see all the autumn crafts made from natural materials. It is worth mentioning that in addition to acorns, cones are used for autumn crafts. Now you can see how to make a funny spider from cones.
For the craft you should prepare:
- 4 branches that will be paws,
- big shot
- plasticine for eyes,
- thread and superglue.
Work progress:
- First we make the spider's legs. To do this, we thread the brush through the thread, and then bend the threads.
- We attach eyes to the part of the cone that is not fluffy.
- Now all that remains is to fasten the thread and hang our spider.

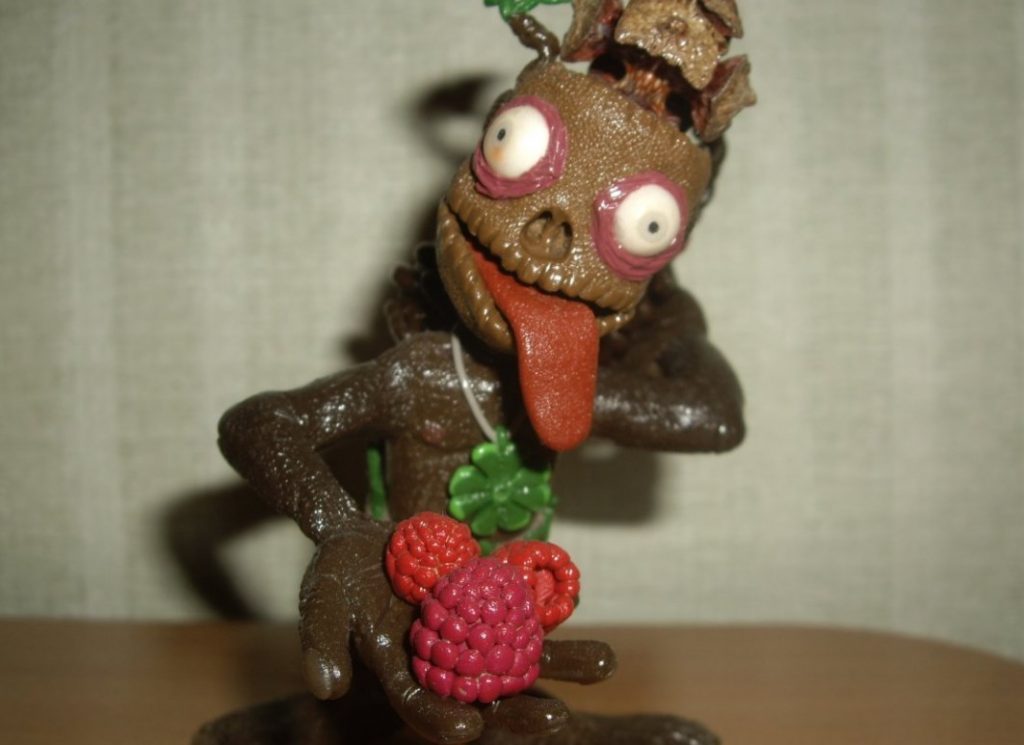
Using the same technology, you can make funny monsters from pine cones.

Crafts from sticks and leaves
You can arrange an autumn star shower in your home at any time of the year. And to make such a craft you must prepare:

- sticks or cuttings from leaves,
- wire and thread,
- small berries and leaves that will be used for decoration.
What better time to make the most beautiful, light-colored fakes, if not in the fall! Nowadays there is so much “material” for art that it’s dizzying. Nature richly gives us its own gifts: multi-colored leaves falling from the trees, a harvest ripened in the garden and flowers blooming in the same place. Before all this is hidden under long snows, it is necessary to act. We just have to choose what we need for the future craft. Here you can combine business with pleasure: climb out into the forest or to a plot in your country house, breathe clean air and collect everything you need for interesting work.
We decorate the house with baskets and vases with gifts of nature
Basket- a necessary object in everyday life, and if it is made from gifts of nature, it is also pleasing to the eye.
How to make a beautiful autumn basket simply and easily
A fairly common method for making an autumn basket is to make it from ordinary cones, of which there are quite a lot in the autumn forest. So, let's begin:

Autumn basket from cones
- we connect the collected cones in the wilderness (large size would be nice) together with wire until a circle of cones comes out;
- for example, if we want to put something in the basket in the future, then we can make it deeper using the second circle of the same circle (if we really want to, we can do the 3rd one);
- we make the handle to the basket exactly the same as the base, only bringing the “garland” of pine cones to a semicircle;
- You can secure the handle to the basket itself using liquid nails.
More ideas for products made from pine and fir cones.

A wonderful basket with gifts of autumn
The next method to make an autumn basket is to take a ready-made wicker basket as a basis and aesthetically fill it with various autumn gifts of nature. What is needed for this:

Basket with autumn gifts
- We take the usual basket (with which we go mushroom hunting) and put a floral sponge in the middle (it can be purchased at any flower shop);
- We place all the autumn flowers there and everything that will require care and watering.
If we want to make a fake basket that will last, then a great option is to use dry materials: acorns, cones, fallen leaves, twigs, tree bark.
Advice: if the initial appearance of the basket is not pleasing, then it can also be resurrected using natural environmental materials. Take acorns or small cones and cover the front side of the basket with them.

Flat autumn basket for door decoration
- if the basket is too deep, put the fabric on its bottom;
- we lay leaves of various colors (oak leaves look especially ideal) and scatter acorns on them;
- in the middle you can place a small pumpkin, next to apples and bunches of rowan berries.
Autumn basket from acorns
All these components have light autumn colors and will delight and remind you of this ideal time for a very long time!

Autumn craft: pumpkin candle holder
If the harvest was successful in popularity, then for an autumn fake you can use a fruit such as pumpkin. And here we have two types:

Making an autumn pumpkin basket
- The handle and base of the craft will be solid. We cut the pumpkin into a basket, taking out all the insides. You can leave a pumpkin tail on the handle.
- We completely remove only the top cap (2-3 mm) and decorate this place with red, yellow leaves, a Christmas tree branch and rowan bunches.
More ideas for autumn pumpkin products for the home and garden.
This option takes a lot of time, but the result is excellent.

Basket made from autumn leaves with your own hands
- take a small plastic bucket;
- we wrap it with a strong rope - twine, and coat the future basket with PVA glue in advance;
- we intertwine branches that bend well and do not break and mark them with glue on both sides of the bucket - the handle is ready;
- any flowers for decoration can be depicted in gouache on your own, or can be glued;
- We fill the finished basket with maple leaves and you can place sprigs of rose hips between them - it looks very attractive.
As far as we know, the entire harvest is harvested from the garden in the fall. And to please yourself for a while, you can make a basket with autumn gifts - fruits. This craft It won’t last long, but it’s quite suitable for a holiday or some home event (for decoration, of course). We can again take a homemade basket, decorate the front side with leaves (planting them on the glue mixture), and place in the middle: pumpkin, decorative cauliflower, decorative small pepper. All this can be placed on dried birch bark. It’s just important to remember to remove all this, since vegetables do not last long in a warm room.

Vegetable basket- idea for an autumn craft
As you can see, there are many ways to decorate, the main thing is to present a clear picture of the result. And nature will be able to help - it will provide all the necessary materials for art. And here is MK’s video on how to make a basket with autumn gifts with your own hands:
It’s very sad to watch how autumn comes after a sunny summer: the leaves on the trees turn yellow, it almost always rains, it becomes cold outside, you have to take warm things out of the closets.
Despite this, autumn can also become beautiful and full of colors during the onset of sunny days. Cheerful children run through city parks, play, and collect colorful bouquets from fallen leaves.

At home I start collecting various crafts for school and kindergarten, and sometimes just for myself. There are a huge number of exciting ideas, and our article will be about them.

Leaf crafts for kindergarten
The child loves to take part in creating various crafts. Show him what can be made from the colorful leaves that filled all the streets of your yard, and he will be incredibly happy to take part in it.
Creating crafts is not only fun; thanks to such activities, children can get wonderful, exciting lessons in getting to know the world around them, develop thinking and creativity. The presented options for working in kindergarten will help you with this.

What is needed for crafts from autumn leaves:
- The leaves themselves, of different colors, sizes and types;
- Stationery (Glue, pencil, scissors, paper, white and colored cardboard);
- Threads;
- Wish.

Possible options for crafts made from leaves
Applique of autumn leaves
It is considered the simplest type of crafts made from leaves. You and your child can easily make an applique in the form of animals or birds.
You can create a lot with dry leaves, PVA glue and paper. To make your work more vibrant, use leaves of different colors.
Crafts from leaves and cardboard
Making a craft from cardboard and leaves is not difficult. You just need to cut out the base from cardboard and glue dry leaves to it.
Herbarium
One of the most exciting and common types of crafts for children is an amateur herbarium. You can collect many types of natural material, which will help your child to study with interest the variety of plants growing in your area. Include as many plant species as possible to create a beautiful herbarium.
Garland of autumn leaves
Dry the leaves, then dip each of them in yellow paint to give the leaves a brighter color. Then we hang the leaves to dry in the form of an elegant garland.
You need to take maple leaves of different sizes and colors, then cover them with transparent varnish. After the leaves have dried well, you need to hang them on strings, decorate them with beads or beads and hang them. The resulting pendant will be an excellent decoration both outdoors and indoors.

Bouquet of flowers from autumn leaves
Flowers created from maple leaves look very impressive.
Vase of leaves
You can use any leaves you like. For one vase you can use several types of leaves, different in color and shape, or you can make them from the same ones.

Instructions on how to make crafts from leaves Applique First, you should prepare all the necessary materials and cover the table with oilcloth.

To create an overlay applique, you should draw the picture itself on cardboard, then apply leaves to the drawing; there is no need to cut the leaves, they are used entirely. Anything that is not enough can be painted on with paints or made from other materials.

Silhouette applique is created from cut leaves. The leaves are cut to realize the intended design with their help.

The most difficult way is to create a modular application. It is made from leaves of the same size. Fish scales or bird feathers are made in this way.

To obtain a symmetrical application, it is necessary to select paired leaves that are identical in all respects.
Pay attention!


Tape - with its help, many details are created in one drawing.
Herbarium
It is better to collect leaves for the herbarium in dry weather, since wet leaves require additional processing. Each part of the herbarium must be straightened with a cold iron; before this, all creases in the sheet must be carefully removed.

If there is constant dampness outside and there is no time to wait for dry weather, then they should be given the opportunity to dry on their own. After the leaves have dried, they are ironed with a warm iron, placing them between two sheets of paper. There is no need to press the leaves with an iron, just press a little so as not to flatten them.
The prepared elements are placed on a sheet of paper, which will serve as a background and at the same time a frame. Fix the leaves with threads or glue.
Bouquet of flowers/rose
In order to get neat and beautiful flowers, the leaves must be even and clean. Place the piece of paper directly in front of you and fold it in half. Then you need to twist half the leaf into a tube, but do not twist it very tightly, the flower should be voluminous.

The result is the core of the flower; we make the petals from the remaining leaves. The core is placed in the second maple leaf. Take turns folding the edges of the sheet to form petals. The sheet can be secured with thread so that it does not fall apart later.

Pay attention!

To make the flower voluminous, you should twist at least six or seven maple leaves in this way, each of which is secured with a thread. To create a bouquet you need several of these flowers.
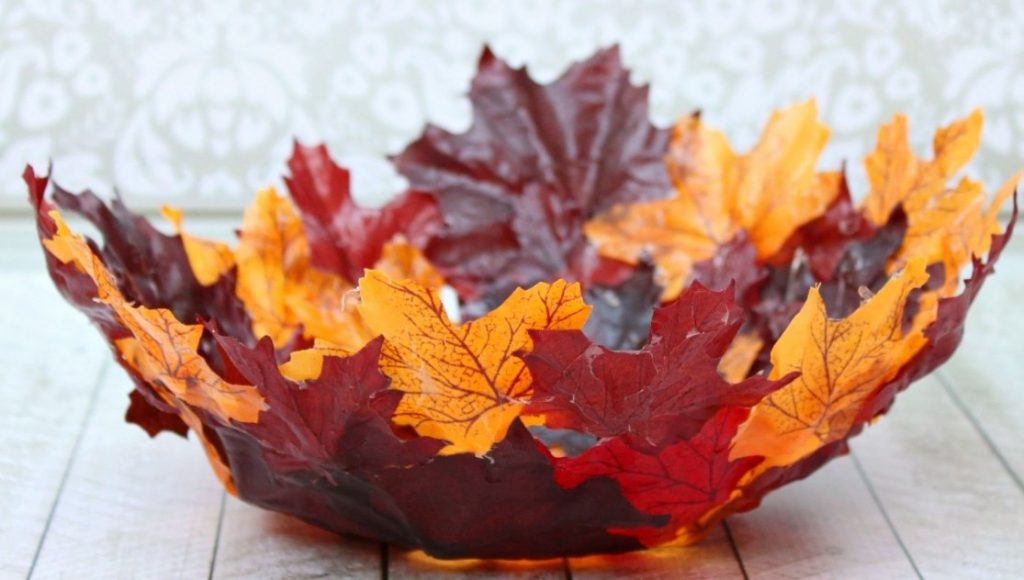
Vase
To make this craft you will need:
- PVA glue;
- Leaves of different colors;
- An ordinary balloon.

You need to inflate the balloon to the desired size of the vase. Take glue diluted half and half with water. Lubricate one half of the ball with adhesive solution.

Each sheet must be properly glued and lubricated with another layer of solution on top so that the upper layers of the sheets adhere just as well. When you have glued the top layer, it should also be lubricated with glue.

After this, remove the ball for several days until it hardens completely. When our fake is completely dry, you will need to burst the balloon. A vase of leaves is suitable for use. Making such work is not difficult, but it is very interesting, so it is good to do it with children.
Photos of crafts made from leaves

Pay attention!


