How to make a paper airplane. How to make a paper airplane (12 best patterns) Origami from A4 airplane
It seems that every child and adult can master the technique of folding airplanes. The simplest methods were passed on from parent to child. But there are also more complex models for making paper flying figures, which are known to few. If you decide to expand your understanding of paper figures from childhood, you can see how to make airplanes out of paper, the diagrams are posted just below.
To fold the figures you do not need glue or additional materials. All you need to prepare is thick paper. If you have not yet encountered complex origami designs, then you should start with simple models.
Simple origami airplane model
- Take an A-4 sheet of paper and fold it in half.
- Fold the top corners of the resulting rectangle towards the center. Straighten the newly folded triangles and secure.
- Fold the obtuse corners of the resulting diamonds back.
- Fold the two side corners back, forming a regular triangle.
- Bend the workpiece and unscrew the wings.
- Bend the tips of the wings and insert them perpendicularly. You've got a fighter.
Paper fighters fly well, so you can launch your invention into the air.
To make it clear how each bend is made, you can use the video “origami airplanes made of paper”, which we attach to the article. You will be able to go through the process step by step with the master, comparing your work with his.
Using the origami technique you can create flying airplanes. A simple design can also rise into the air, but there are plans for more impressive designs that can take more than an hour to fold.
The coolest ones are those that glide smoothly over a fairly long distance. For example, this paper airplane, despite its simplicity, pleases with its movements in the air.
Model of a simple paper stunt airplane

- Fold the square first horizontally, then vertically. Expand the sheet.
- Fold the top towards the center.
- Fold the top corners, but do not connect in the center.
- Fold the corners back to form a triangle.
- Fold the top of the triangle. Bend the structure in half
- Fold the right angle inward (step 7).
- Unfold the wings.
These are instructions for folding a stunt plane. Launching such a craft into the air will bring pleasure to both children and adults. He makes intricate circles in the air and flies quite far.
Origami airplanes with good aerodynamics
In addition to airplane figures, there are also origami birds that are launched into the air.
- Fold the square sheet diagonally.
- Fold the resulting triangle in half.
- Open one triangle into a square and press.
- Turn the workpiece over and fold the corner into a diamond shape.
- Make bend lines for three corners of the rhombus: side and top.
- Peel the top layer and press.
- Turn the workpiece over and do the same on the back side.
- Fold the bottom corners of the diamond and connect them, tucking the tips of one into the pocket of the other.
- Move the upper triangles apart and secure. It is very important for children that the craft performs some kind of action. Therefore, the product must have wings to stay in the air.
- Fold the top layer of the bottom corner up. Fold the nose down, then back up.
- Turn the workpiece over and form a tail.
Such a swallow will be able to perform a relatively short flight. But you and your children will be fascinated by playing with paper birds. Try to make a lot of swallows with your child and organize a large-scale flight to the south. The child will benefit from such an activity in many ways: developing finger motor skills, physical activity during play, and strengthening relationships with parents. After the game, the crafts you make can be hidden for next time or given as a gift to someone.
Educational video lessons to help beginners
The art of origami is a great way to keep your child busy and spend time together. One of the best and most useful hobbies for children. Making these crafts develops accuracy, attention and fine motor skills. Airplanes using the origami technique, made of paper, come in a wide variety: from the classic ones that everyone made in childhood, to the coolest fighters. The problem is that not all of them are good flying airplanes. You can consider several schemes of the simplest and fastest models. You will soon learn how to make a beautiful airplane out of paper using the origami technique.
Making an airplane from childhood using origami technique
Take paper of any color, A4 format.
Folds in half lengthwise.
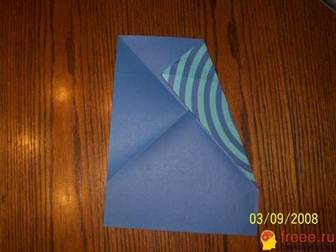
It is straightened back and placed vertically. The corners are bent towards the middle.

Then the sides are folded inwards again, as shown in the photo.


Now it bends in half, lengthwise.
We need to spread our wings. Fold them over the sides.

It turns out an old familiar airplane, like this:

More difficult work using plain paper
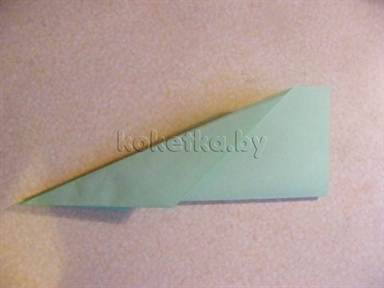
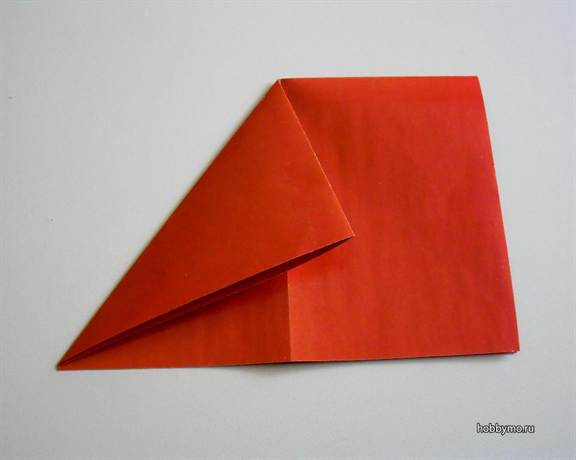
The creators claim that he holds the record for longest flights. The paper format is the same, A4. The sheet is taken by the corner and bent into a triangle.
Then you need to straighten it back and, holding the other corner, bend it into a triangle too. Folds are needed, so you need to carefully iron the folds. It turns out like this:


Now you need to fold the future plane in half, lengthwise.

Unfold it back and fold it again, but across it.

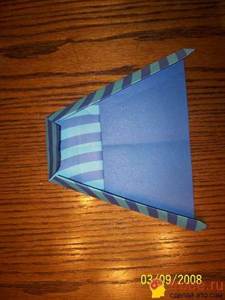
The middle is folded upward and two new side lines are made for the fold.

Now the sides are bent, up to the fold line and again.
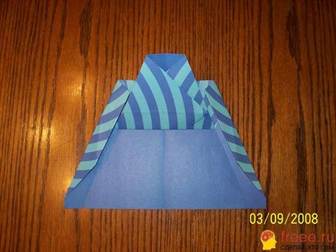

The sides are now vertical and you need to bend the nose towards them.
The plane neatly folds in half.

The wings bend down.

And the plane is ready!
Just don’t throw the airplane too hard, this will only make it fly worse.
We create a fighter plane using interesting designs
In the instructions for the airplane, the creators claim that it flies perfectly in open areas. He needs room to fly.
The paper format does not change, A4. The sheet is folded in half lengthwise, then unfolded.

Now folds across.

The corners are bent inward and straightened again.

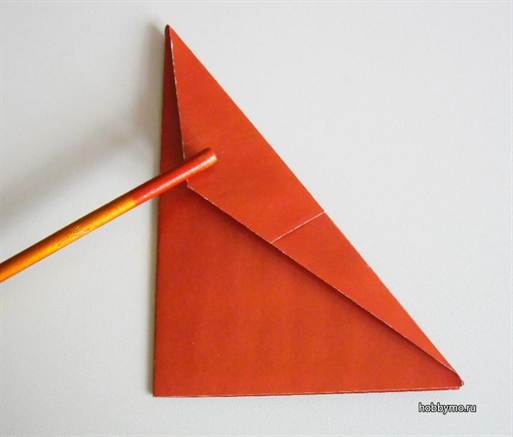
The side parts are folded again, but now up to the fold line.
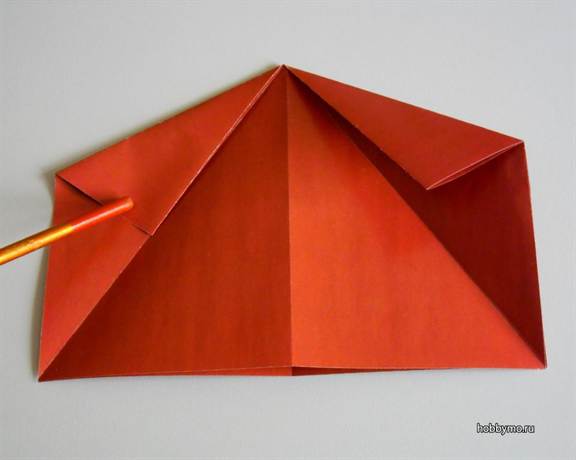
A pencil is inserted into the side parts and moves them apart, making a pocket.
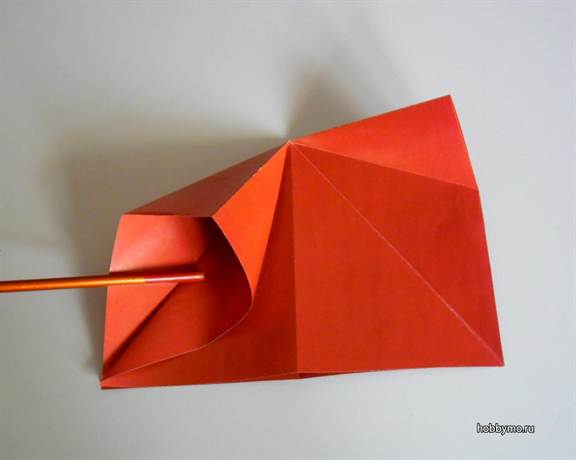
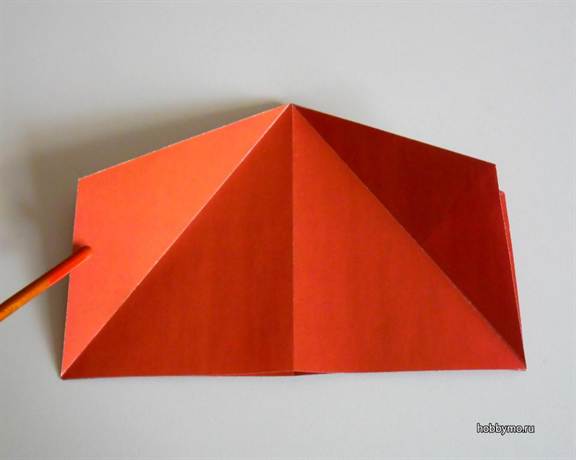
The sides are flattened and smoothed.

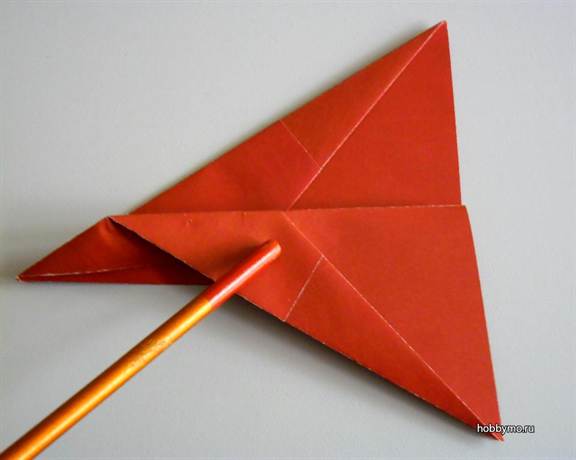
Fold in half, towards the edge. You will get a figure like this:
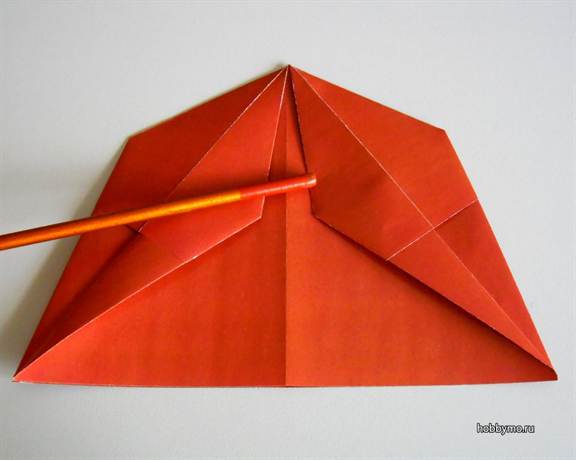
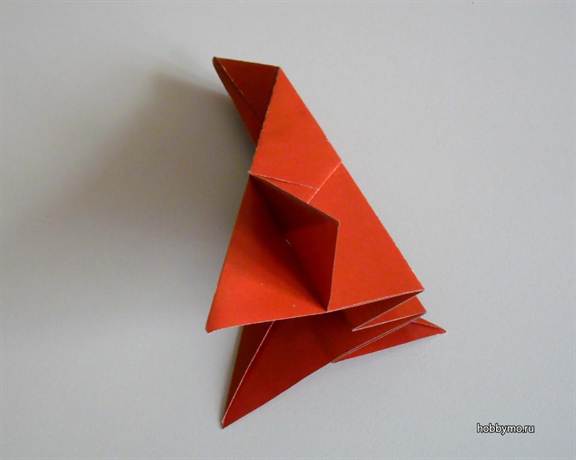
The movable top of the small triangles now bends inwards.

The figure is turned to the opposite side and here the sides are also bent.

Bend diagonally towards the middle, as shown in the photo.
The sides of the resulting diamonds are folded under the figure.

It turns out to be a triangle that needs to be folded in half vertically.
The figure is placed down with the longer side and a line is drawn, approximately 2.5 cm from the edge of the fold. Like this.

The upper part of the triangle (wing) bends down exactly along the line.
It's the same on the other side.

The movable edge of the delta wing bends upward at a right angle.

In today’s article, we propose to create the most popular toy among boys - an airplane made of paper, origami - a technique that will help improve the fine motor skills of the baby’s hands, as well as keep his fidget busy for a few minutes. You can create with your child and help him in complex processes, spending more free time with the most precious person on this planet.


Simple option
There are a huge number of options for the process of creating a paper airplane with your own hands, and one of them is origami. This technique came to us from Japan and helps to create very beautiful and cute paper crafts. For the classic method, you need to prepare a solid sheet of paper or corrugated cardboard. Another characteristic of origami is that you do not need to use scissors and glue, so we advise you to start creating an air apparatus with your baby in order to develop fine motor skills in his hands. The manufacturing process can be followed using the example of step-by-step instructions.
For materials, use thin paper, just one sheet, as well as felt-tip pens or colored pencils.

Now let's start creating. First of all, fold a sheet of paper vertically, then unfold it. Fold the two upper corners towards each other along the fold line. We don't unfold. We fold these corners one more time. You should get this result: the edges do not connect to each other and do not intersect on the central fold. Then we bend the upper sides down on the right and left sides. At the last stage, raise each part of the figure and decorate the wings of the airplane. We made this toy in just five minutes.

In the previous photo you can see a diagram of creating an airplane made using the origami technique in this master class.
Related article: Wrinkle-resistant fabrics for dresses, shirts, suits

Conquer the sky
We all know that preschool children love to make things out of cardboard, paper, and even a matchbox. So let's make a flying machine out of plain paper. In the next stage of the article, we will tell you in detail how to make an airplane that can take off with your own hands.
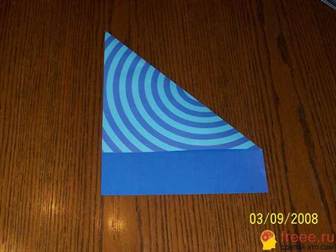
Take a thin piece of cardboard and make a square out of it. Fold the sheet diagonally, and then cut or tear off the excess bottom part. After this, unfold the workpiece and fold it in half. We bend all the upper edges towards the center of the workpiece. We have a triangle that we bend. Again, fold the edges towards the middle, and then fold the entire sheet of paper in half. Bend the corners, so you have the wings of an airplane.
If you use corrugated cardboard in your work, you can get a very impressive tail or voluminous wings. Thanks to this, small planes will be able to stay in the air longer. If you want your airplane to last longer, then throw it up with all your might. In the photo you can see how beautiful we turned out.

If your kid is so enthusiastic and makes a huge number of airplanes, then offer to make him a whole fleet of aircraft. Where will he be? Exactly, we need to make an airport. This can be made from a box and a huge sheet of paper. We model real airplane routes on whatman paper, draw landing lines, and plot the points at which the airplane lands and departs. In fact, you or even your baby can easily create a huge number of options for games with aircraft, the most important thing is to make them, as you have already seen above. Using your imagination, you can improve the aircraft or decorate it with additional materials.


 Second diagram of a classic aircraft


